 |
| Freshly Fried Yeast Doughnuts |
I don't like stale doughnuts, and if you are reading this then you don't either.
Solution? I am going to show you how easy it is it make your own doughnuts!
I am not talking about biscuits from a can that you can cut out like doughnuts, either. I am talking, for-real, delicious, yeast-raised doughnuts from scratch!
So let's get started. First, be sure to get all of the ingredients(scroll to the bottom for the recipe), most of which are usually in the common household, and set them out.
Next, you will need to do a few simple things(trust me, it will make life easier when it comes time to prepare the doughnuts, as time is of the essence once you begin)before you get to the real work.
Once you proof your doughnuts, it will be very difficult to move them to the oil without deflating the air from them(something I learned the hard way the first time I did them - Lesson learned!)so you need to be sure that it doesn’t happen by being prepared. There are two options in order to avoid this. One is to heavily flour a cookie sheet to place your cut doughnuts on. I do it that way sometimes, but I find that the excess flour on the dough clouds my oil too much, which I like to reuse a few times before discarding. So that brings me to option 2, which is to make wax squares lightly sprayed with cooking oil so that you don't have to use the flour. Also, the wax paper is oil safe, which is a win-win in my opinion. So here we go!
Make Wax Squares
 You’ll want to get your round cutter, or if you don’t have a cutter like mine you can use a clean soup can to punch out your doughnuts(minus the lid) and a bottle cap to cut out the centers.
 Get your wax paper and tear off a sheet just about the width of whatever cutter you plan to use with a little room to spare. I am using 3 7/16 for the circles and 1 1/2 for the centers
Preparing your wax squares is a must to make this an easier process. Just spray the completed squares with a bit of cooking spray before proofing your donuts to keep them nice and plump. You also want to spray the tops of your doughnuts with cooking spray so that when you remove the plastic wrap, it won't cling to the dough and possibly deflate it. Just nice and slow when you peel off the plastic wrap after proofing.


Use a ruler to keep it straight as you tear downward.


You will have a long strip of wax paper.
Put your cutter on the top most part of the wax paper just beneath your cutter, with a bit of room to spare, and then cut across with scissors so that you have a square of paper that is slightly larger than your cutter.
 I used some of the cutters from a stacked cookie cutter set that I got a few years ago, and often use them while making gumpaste items or cookies for my custom cake business, Gigi Cake Shoppe.
 With such a wide variety of sizes, these are great for multi-purpose use. For my set of cutters, the sizes range from 3 7/16 down to 1 1/2 and one of the most basic cutter sets can be purchased here. They also come in different shapes as well. Or, you can use a doughnut cutter which will cut the big and small hole simultaneously.
Time for a quick Science Lesson!
Proofing is a practice of letting your freshly mixed dough rest and allow the yeast(which is a live culture) to expand and grow it as it eats the required sugar in your recipe, which gives it a light, fluffiness. You can use either Active Dry Yeast, which must be prepared with warm milk and/or warm water and sugar, which the yeast eats and helps it grow and expand your dough. Or you can use instant yeast, which begins the growing process(or yeast-feast) as soon as it touches the warm liquid(s).
I tend to use the instant yeast since I use my trusty bread machine(on the dough cycle), but most people who use a stand mixer, or God help you, mix it by hand, find using Active Dry Yeast a better option. You'll get a heck of a workout if you dare go by hand, but it CAN be done. Most yeast recipes call for the dough to rest once after mixing, punched down to remove the gas which makes it expand during the resting period, then shaping it for whatever you want(bread, doughnuts, cinnamon rolls(my personal favorite)) and then letting the shaped dough rise a second time before baking.
If you plan to bake later, you can simply shape the dough after the first rise, place in your pan(s), cover with plastic wrap and freeze. Bring it out to the counter when ready to bake and allow to come to room temperature. You will also notice that it rises as it gets warm. Or sometimes you can shape it right out of the mixing period and let it do the first rise overnight in the fridge, a "slow rise",bring to room temperature(in which it may rise a bit more, and that's okay!) and bake it. I do this sometimes when I want fresh doughnuts first thing in the morning but don't want to go through a long process of preparation. If your doughnuts accidentally deflate after the second rise, then you will have to let them sit in a warm, draft-free place to rise again. I usually set my shaped, covered dough on a cookie sheet in the oven with the oven light on, wich will be just about the right temperature for it to re-rise.
Mixing The Yeast Dough

| If you are using a stand-mixer, it's a little bit different(but not by much!). You can use Active Dry Yeast, sugar and the warm water and allow it to 'bloom' first in a bowl. This is the process in which the yeast eats the sugar and grows. Takes about 5-10 minutes and you will be able to tell that it's done since it will be doubled in size and foamy on top(like a beer!) When that's done, you can simply add your flour, a little a time, into the bowl after you put in your egg and butter. You can use the paddle attachment when adding the first cup of flour to fully incorporate the wet and dry ingredients, but you'll want to switch to the dough hook to do the heavy work for the remainder of the flour. Don't be alarmed if your mixer rocks a bit once you add all of the flour. The important thing is mixing it on medium-high speed for at least six or seven minutes to properly develop the gluten. You want light and fluffy, not dense and heavy. Just keep an eye on it. If you are doing it by hand, the same rules for using Active Dry Yeast apply, but you would simply use your hands to work the dough instead of the dough hook. You will get a good workout since you are going to be eating doughnuts and now you won't feel so guilty for doing so! If you are going the stand-mixer or hand route, be sure that you spray the bowl you are going to do the first rise in with cooking-spray so that the dough won't stick to your bowl. Put the dough in, turn it a few times against the sides to coat it with the oil so that your dough is non-stick. Put a sheet of plastic wrap over the bowl and seal it tight. Place your bowl in your oven with the light on ONLY. If your oven doesn't have a light, you can place a glass measuring cup full of water in the microwave for 1 minute. Leave the steaming cup in the microwave and put your bowl in there with it and close the door to seal in the heat. Let it rise for about an hour. Most bread machines automate this process.
Cutting Your Doughnuts
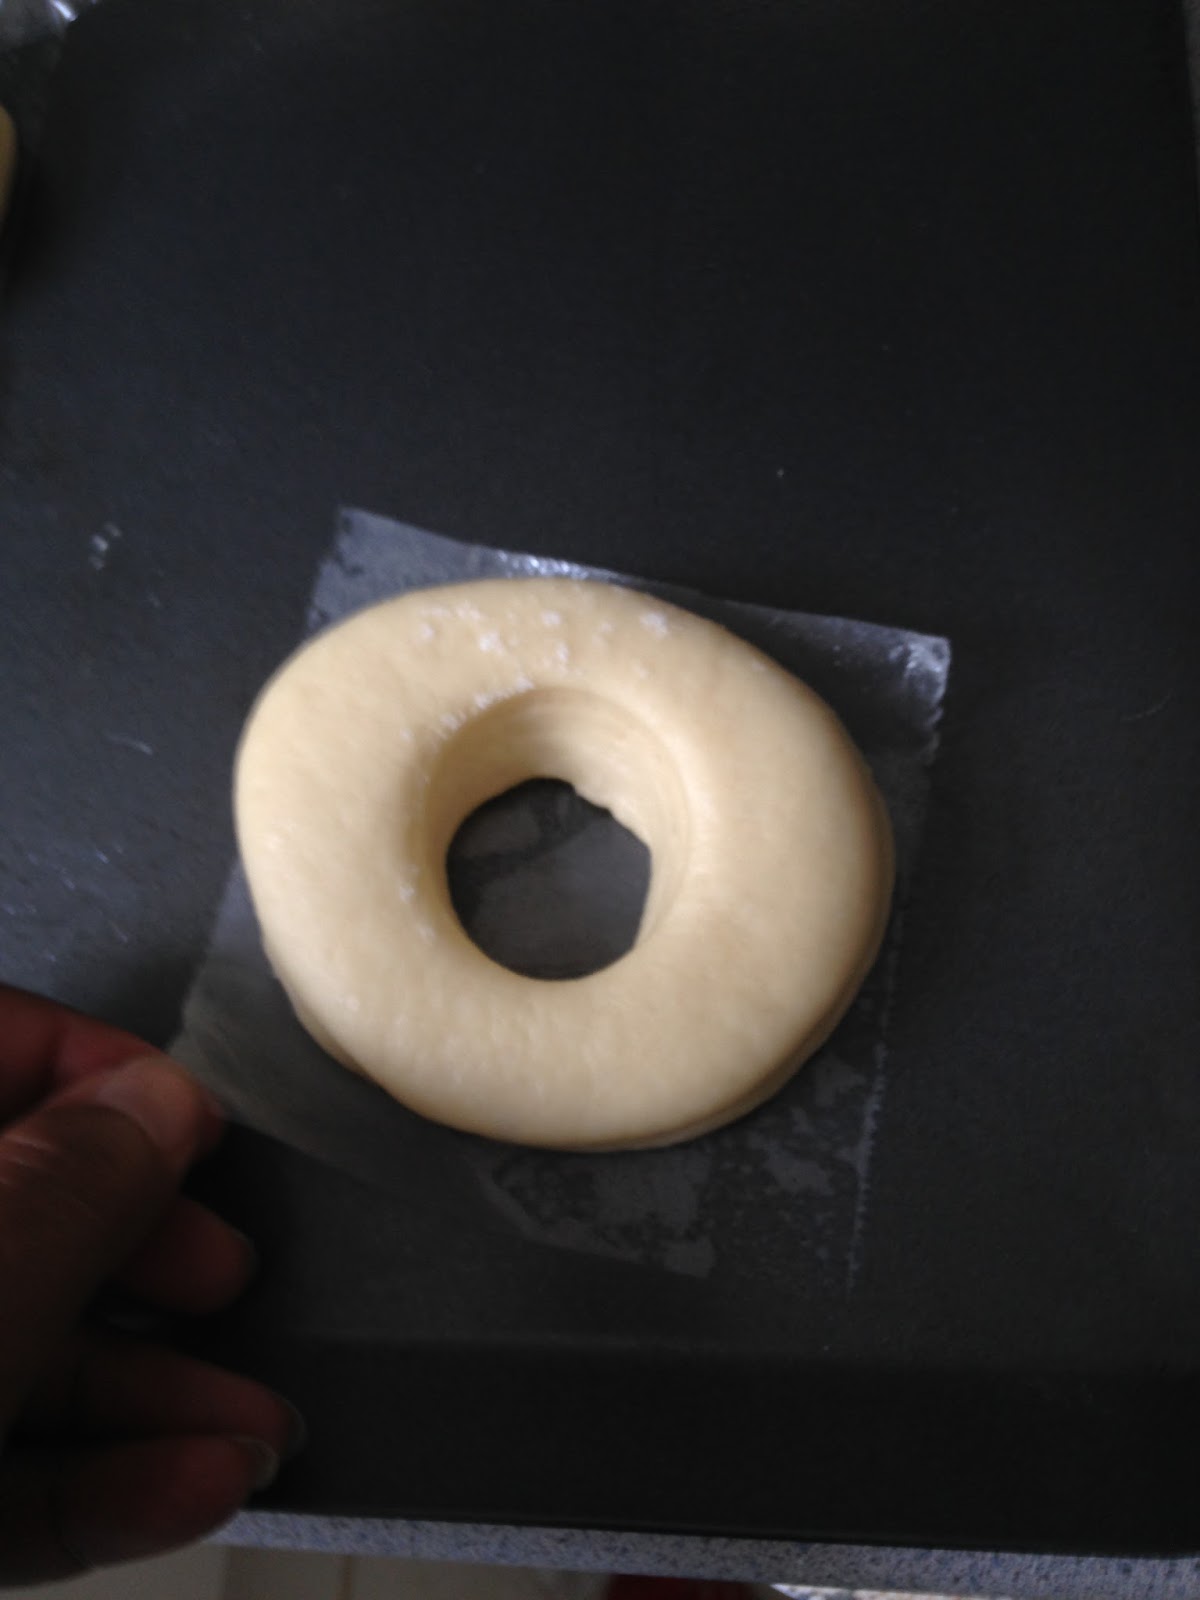
Using the cookie cutters, cut out your doughnuts after flouring the large cutter between each cut. Be sure to apply pressure to the cutter and give it a full twist to be sure that it cuts through your dough. Next, use the small cutter to remove the centers from the dough(if you want)or leave them whole if you plan on filling your doughnuts with jam, pastry-cream, etc.
Get your wax squares and place them on a cookie sheet. Spray the squares lightly with cooking spray and then place each of your doughnuts on one of the squares. You can make extra squares to use for your doughnut holes, which you can also fry. Great treats for kids!
   Once you have prepared your doughnuts and holes(if you went that route) pop the plastic wrap covered tray in your oven for an hour. Dependent on your oven, it may be done a little sooner than that or a little bit later. Just make sure that you doughnuts have at doubled in size and are fat and puffy. We want to keep them like this until we can get them into the oil, which is why it's best to use the wax squares.
You are simply going to lift the wax paper by the corners and set it, with the doughnut on top of it, into the hot oil. Watch for the paper to loosen and use tongs to grip and fish it from the oil. If you proofed your dough correctly, your doughnuts should float on top of the oil without ever sinking underneath. I usually do the holes first to kinda 'test the waters' a bit and see how they fry. If the holes sink, then you can put your cookie sheet back into the oven for another five or ten minutes to give it more time to rise. If they float straight off, then you're good to go!  Now you want to check the coloring of your doughnuts. Using a pair of wooden chopsticks(I usually load up on them from Benihana, Panda Express, Sarku - wherever!), which will bubble on the tip if you test the oil with them first - letting you know the oil is hot enough, slip it underneath one end of your doughnut and raise it slightly to see the color. It should be a nice medium, golden brown. I usually fry them for about 30-40 seconds on each side at a steady 360 degrees. I have an electric fryer that allows me to set the temperature, but a simple candy-thermometer will do the trick to check your temp. Just be sure that the tip of the thermometer doesn't touch the bottom of the pan otherwise you will get a false reading since that's where the flame is. Keep it clipped to the side and just below the surface of the oil to get a good, true reading. Once you have a nice golden brown, use both chopsticks to gently flip the doughnut over to fry the other side. Don't crowd them, but depending on the size of your pot you may be able to fry at least three or four at one time. My fryer is kinda small, and the doughnuts sizeable so I usually just do two at a time. The holes I tend to do all together, after testing the first one, since they are so small. Now you want to check the coloring of your doughnuts. Using a pair of wooden chopsticks(I usually load up on them from Benihana, Panda Express, Sarku - wherever!), which will bubble on the tip if you test the oil with them first - letting you know the oil is hot enough, slip it underneath one end of your doughnut and raise it slightly to see the color. It should be a nice medium, golden brown. I usually fry them for about 30-40 seconds on each side at a steady 360 degrees. I have an electric fryer that allows me to set the temperature, but a simple candy-thermometer will do the trick to check your temp. Just be sure that the tip of the thermometer doesn't touch the bottom of the pan otherwise you will get a false reading since that's where the flame is. Keep it clipped to the side and just below the surface of the oil to get a good, true reading. Once you have a nice golden brown, use both chopsticks to gently flip the doughnut over to fry the other side. Don't crowd them, but depending on the size of your pot you may be able to fry at least three or four at one time. My fryer is kinda small, and the doughnuts sizeable so I usually just do two at a time. The holes I tend to do all together, after testing the first one, since they are so small.  
Finishing Up
 When you finish frying all of your doughnuts, you'll need to get rid of the excess oil. Set up a cookie sheet, with a cooling rack over it. Line the cookie sheet with paper-towels to catch dripping oil from the doughnuts. You can also give them a quick blot if you don't have a rack. With the rack still in place, you can either glaze your doughnuts and then let excess drip off. Or you can roll them in cinnamon-sugar mixture. For this one, I decided to let my doughnuts cool completely and then dip them in a white-chocolate icing. Also, I made some long, rectangular ones, which I filled with my home-made strawberry jam(made from strawberries I grow in my side yard)after glazing. Be sure that you set up your doughnut workstation before getting started so that you can go from frying to oil, to drip dry to glazing/sugaring/filling. Believe me, it will save a hassle since you won't have time to go hunting for things while your doughnuts are frying. Once the doughnuts are finished frying, you can poke one of your chopsticks through the hole(use tongs if you didn't make a hole in your doughnut, or two forks to support it as you lift it out)and simply lift up the doughnut on the end of the stick. Let it drip for a moment or two before you put in onto the rack to dry. Continue to do this for all of the doughnuts before shutting off your fryer/open flame. Notice the white ring? These are some seriously perfectly proofed pastries!(try and say THAT five times fast!) When you finish frying all of your doughnuts, you'll need to get rid of the excess oil. Set up a cookie sheet, with a cooling rack over it. Line the cookie sheet with paper-towels to catch dripping oil from the doughnuts. You can also give them a quick blot if you don't have a rack. With the rack still in place, you can either glaze your doughnuts and then let excess drip off. Or you can roll them in cinnamon-sugar mixture. For this one, I decided to let my doughnuts cool completely and then dip them in a white-chocolate icing. Also, I made some long, rectangular ones, which I filled with my home-made strawberry jam(made from strawberries I grow in my side yard)after glazing. Be sure that you set up your doughnut workstation before getting started so that you can go from frying to oil, to drip dry to glazing/sugaring/filling. Believe me, it will save a hassle since you won't have time to go hunting for things while your doughnuts are frying. Once the doughnuts are finished frying, you can poke one of your chopsticks through the hole(use tongs if you didn't make a hole in your doughnut, or two forks to support it as you lift it out)and simply lift up the doughnut on the end of the stick. Let it drip for a moment or two before you put in onto the rack to dry. Continue to do this for all of the doughnuts before shutting off your fryer/open flame. Notice the white ring? These are some seriously perfectly proofed pastries!(try and say THAT five times fast!)
Dipping Doughnuts
While I was waiting for my dough to rise the first time, I made some of the glazes and icings I wanted to use. I have tons of sprinkles of different colors from my cake shop, so I decided to bring them out. You can pretty much use whichever ones catch your fancy. This can even turn into a fun family event by letting everyone help decorate the doughnuts. Just check out my niece, Gianna, as she painstakingly decorates her doughnuts.

I usually glaze them warm or toss in white sugar/cinnamon sugar/combination of both and serve right away, but sometimes I make them and let them cool first before topping with icing. Use any icing you want along with any sprinkles you want. Again, it's a great family activity and the kids will love showing off their own doughnut. And apparently posing with them as well!(as you can see from my ham of a niece, Gianna)
 Freezing Doughnuts  You may decide that you are going to freeze your doughnuts, which is something that I do if I am not going to serve them right away. You can wrap them. unglazed, in wax paper individually and then put them in a gallon freezer bag. Date it and label it so you remember that you have them. When you are ready to have them, simply pull them out of the freezer and let them come to room temperature. You can then dip them, or toss them in the microwave for about 10 seconds to get them warm enough to glaze. You may decide that you are going to freeze your doughnuts, which is something that I do if I am not going to serve them right away. You can wrap them. unglazed, in wax paper individually and then put them in a gallon freezer bag. Date it and label it so you remember that you have them. When you are ready to have them, simply pull them out of the freezer and let them come to room temperature. You can then dip them, or toss them in the microwave for about 10 seconds to get them warm enough to glaze.I hope you enjoyed the first of many blogs for Easy Eats With Erica. Feel free to email me any questions you have about the recipe, and please post your pics when you do yours! 
Easy Yeast Doughnut Recipe(courtesy of www.topsecretrecipes.com)
Erica's Note: I use instant yeast, which is about 2 1/2 teaspoons instead of the packet of Active Dry Yeast. Read the back of your package to be sure what the liquid temperature should be. In my case it's anywhere from 120-130 degrees Farenheit. It may be different for active dry, but probably not. Too hot, the yeast will die. Not hot enough, the yeast won't activate. Get a standard digital thermometer to measure the temperature of the liquids.
| ||||||||||||||||||||||||||


“ With the humidity we've been having all over the Northeast, the weather has not been the best for the survival of doughnuts, which actually begin to stale as soon as you remove them from the fryer(I'll go into preventing this in a bit)”
ReplyDeleteYou never went on to explain how to prevent them from getting stale.